Secure Your AWS Account
Introduction
Welcome to Chapter 3 of our "Mastering AWS DevOps" series. In this blog post, we will guide you through securing your AWS account, a crucial step to protect your cloud resources from unauthorised access and potential threats.
In this blog, you will learn:
- The importance of strong passwords and how to create them.
- How to enable Multi-Factor Authentication (MFA) for an extra layer of security.
- Steps to configure a virtual MFA device.
You can watch this in the video below:
The importance of strong passwords and how to create them.
So, let’s start with
A. Protection Against Unauthorized Access: A strong password makes it challenging for an unauthorized person to access an account and perform unauthorized activities. It protects your AWS account from potential threats.
B. Safeguarding Financial Information: A strong password helps protect your bank details, credit or debit card details and online payment systems.
C. Maintaining Privacy: Personal and professional privacy can be compromised if an attacker accesses your email, social media or cloud accounts.
D. Reducing the risk of data breaches: Many organizations have security policies requiring strong password protection to protect their system and confidential data.
So, strong passwords are your first line of defence against cyber threats and attacks. They ensure that only authorized individuals have access to your AWS account and data. A strong password for your AWS account will safeguard all your cloud resources and information, maintaining the highest level of security.
How to Create Strong Passwords:
Creating strong passwords involves combining various elements to make them difficult to guess or crack. Let’s start,
Creating a strong password
- At least 12 characters long
- Mix of upper and lower case letters
- Includes numbers and special characters
Example: P@ssw0rd123!
Enabling Multi-factor Authentication (MFA)
Multi-factor authentication (MFA) adds an extra layer of protection by requiring a second form of authentication in addition to your password.
Here's how to set it up:
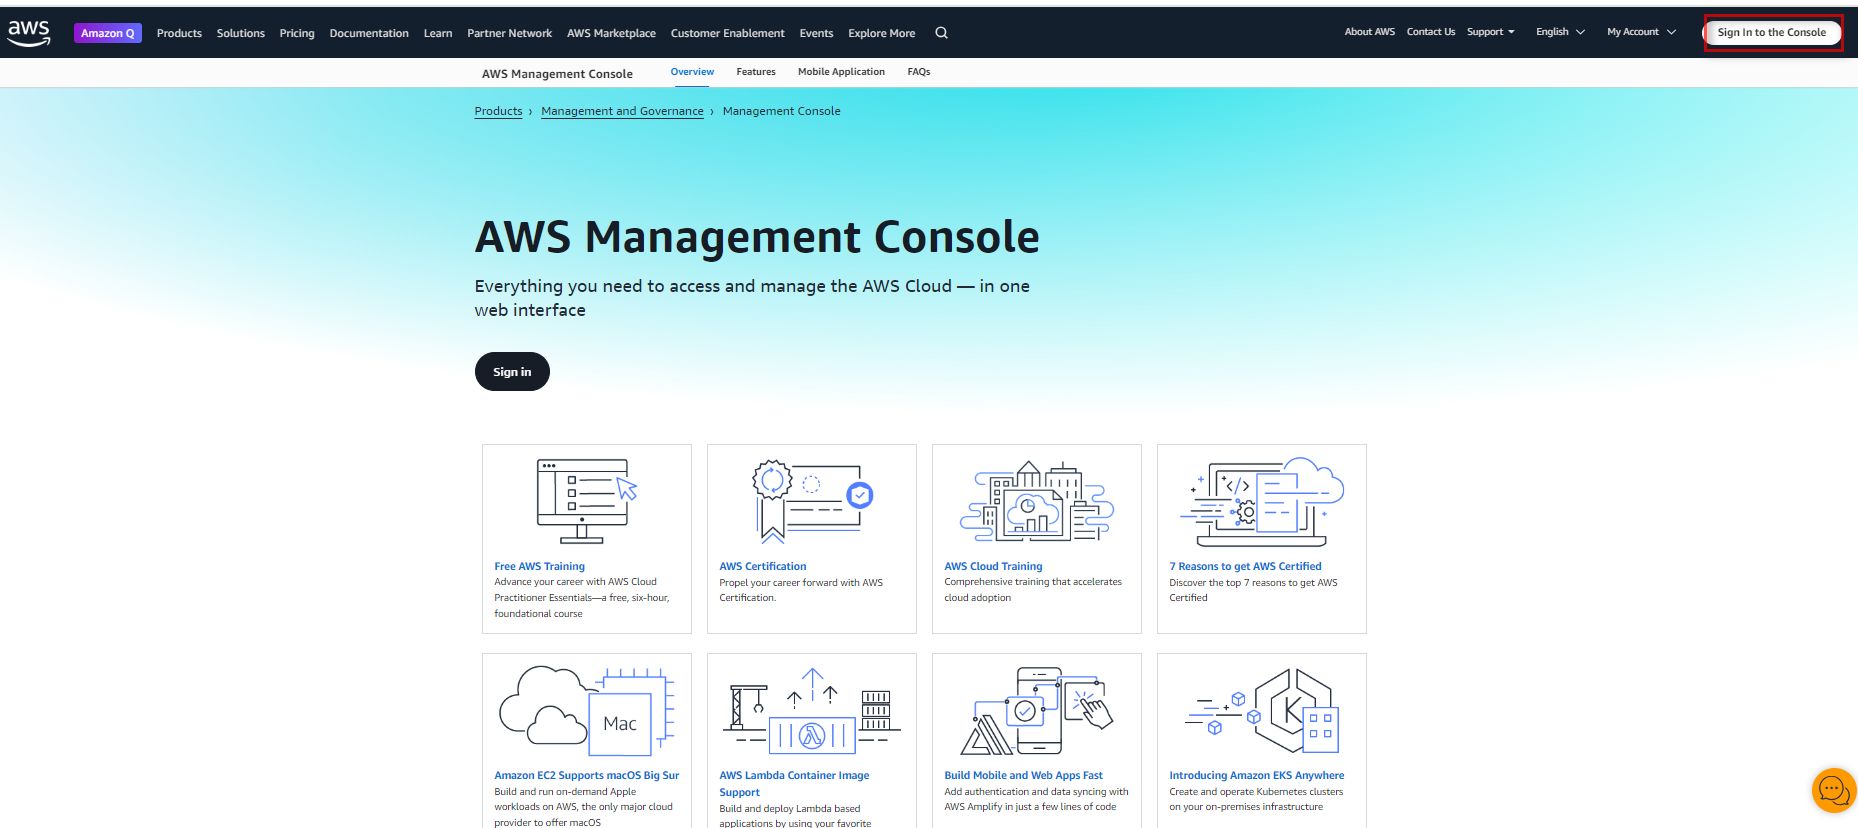
Step 1:Sign in to the AWS Management Console.
Search on Google AWS Management console and the page will open. In the top right corner, there is a button to Sign in to the console. Click on this button. (Figure 1.1 AWS Management Console)
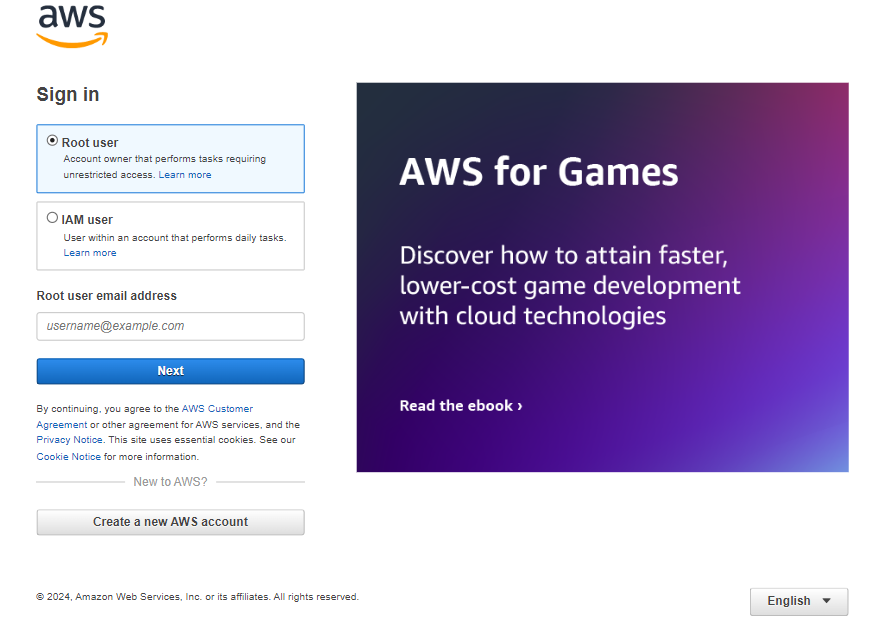
Step 2: Sign in to the Root user page.
On this page, you have to select the root user toggle button and type the email ID in the Root user email address box. Click on the Next button and you have to give your password and successfully log in on the AWS management console page. (Figure 1.2 Root user login)
Step 3: After successful login, you are on the Console home page and all the AWS services are there. In the top right corner, your account ID and other options are available. You have to click on the security credentials. (Figure 1.3 Console home page)

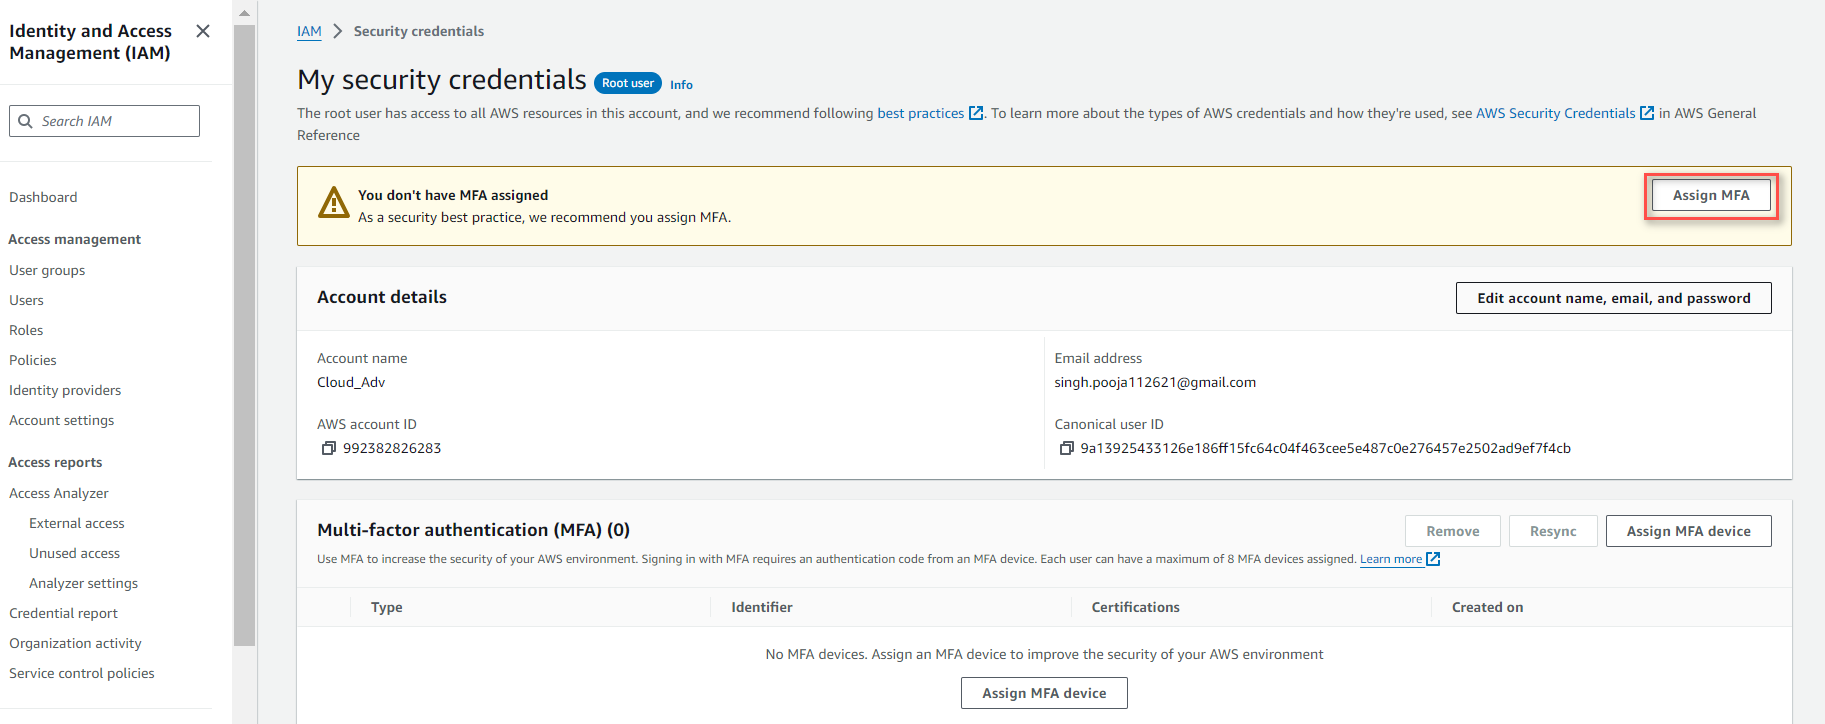
Step 4: When you click on the security credentials, you will be navigated to the AWS service, IAM (Identity and access management) dashboard. Here you can see the option Assign MFA. Click on the Assign MFA button. (Figure 1.4 IAM Dashboard)
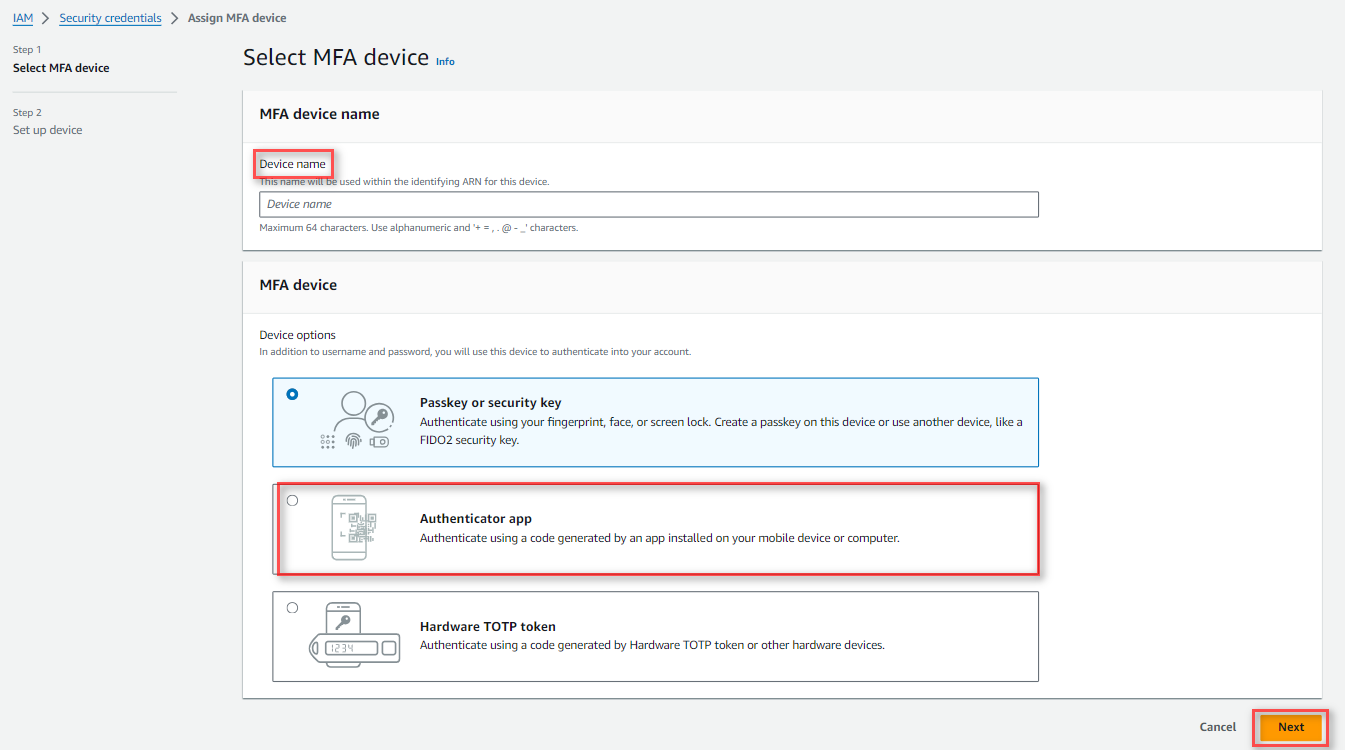
Step 5: Now you can see the MFA device name, and give a suitable name here. After that, there are 3 options for MFA to set up in your account.
1. Passkey or security Key: A passkey provides a password-less approach and a security key provides a physical secure authentication method.
2. Authenticator app: You can download it on your smartphone.
3. Hardware TOTP token: A hardware TOTP token is a physical device that generates a time-based one-time password for user authentication.
Select the Authenticator app toggle button and click on the Next button.(Figure 1.5 Select MFA device)
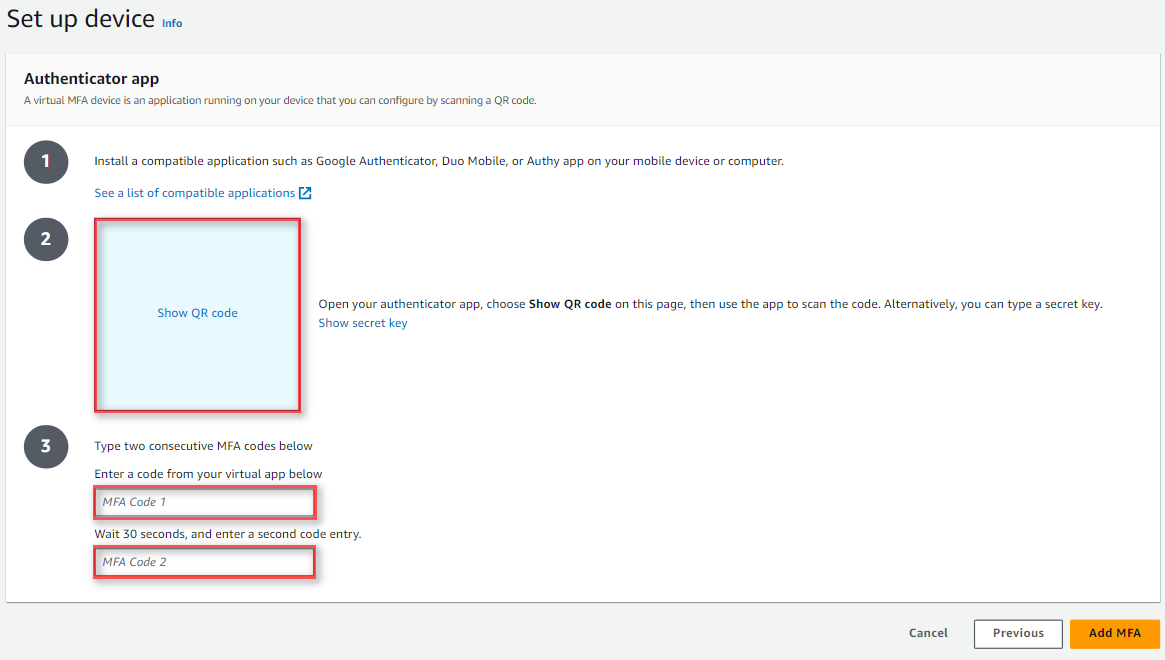
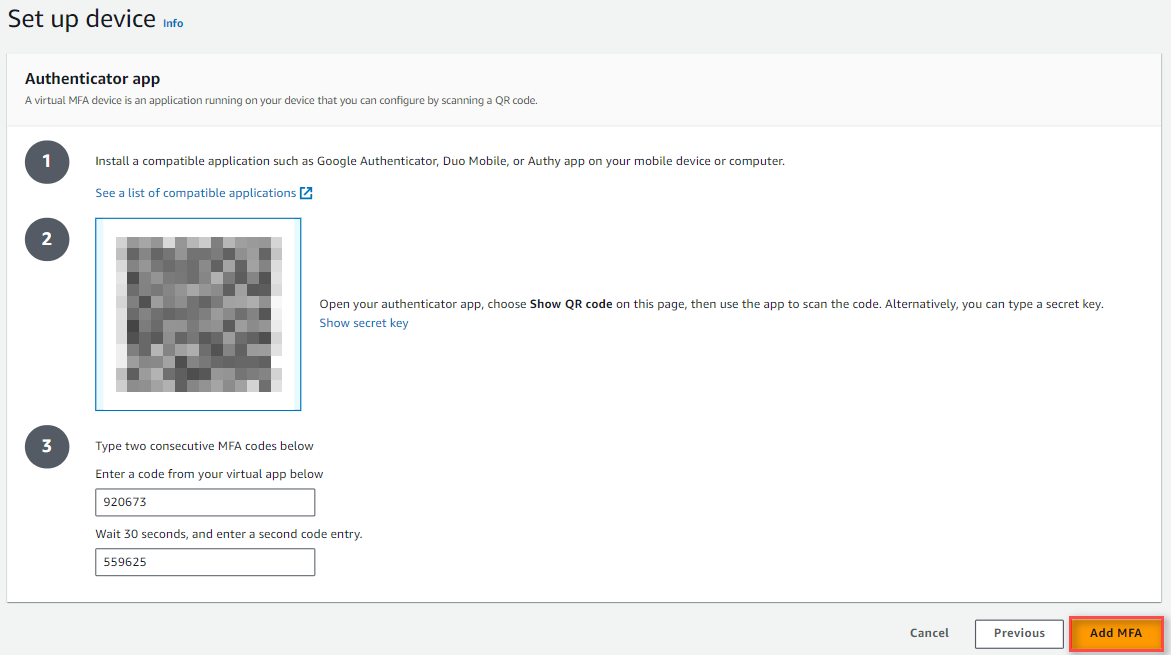
Step 6: Here you will be on the Set-up device page. The Instructions are given to install the authenticator App on your mobile. (Figure 1.6 Set up device)
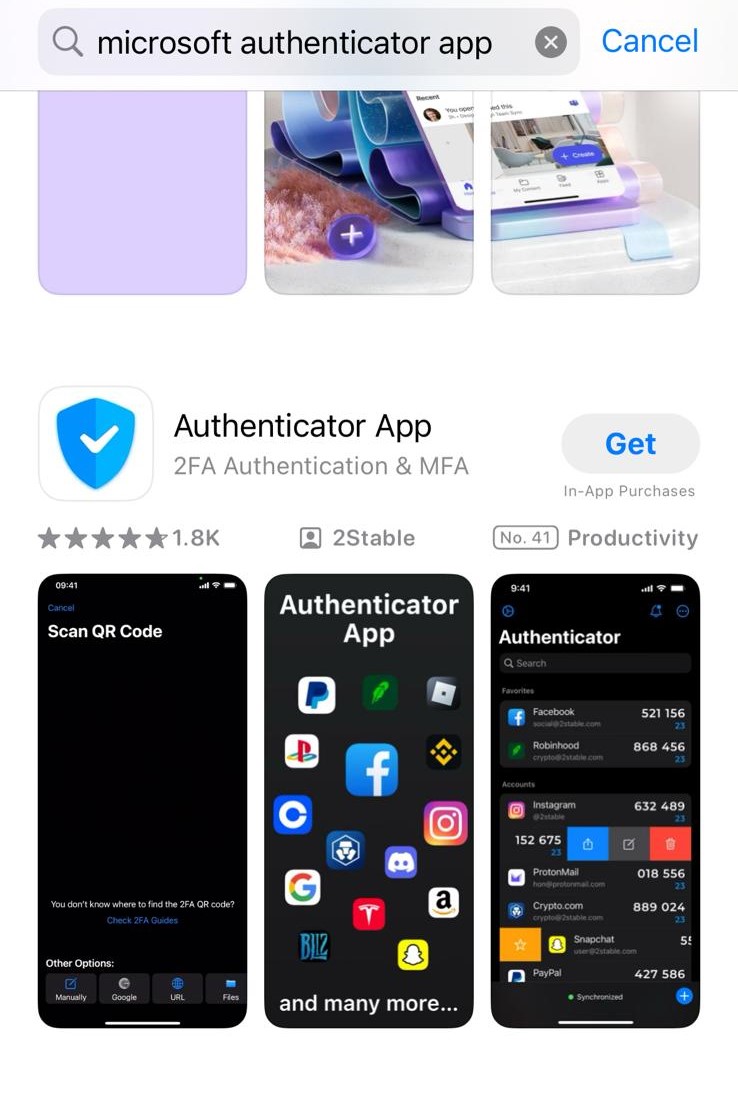
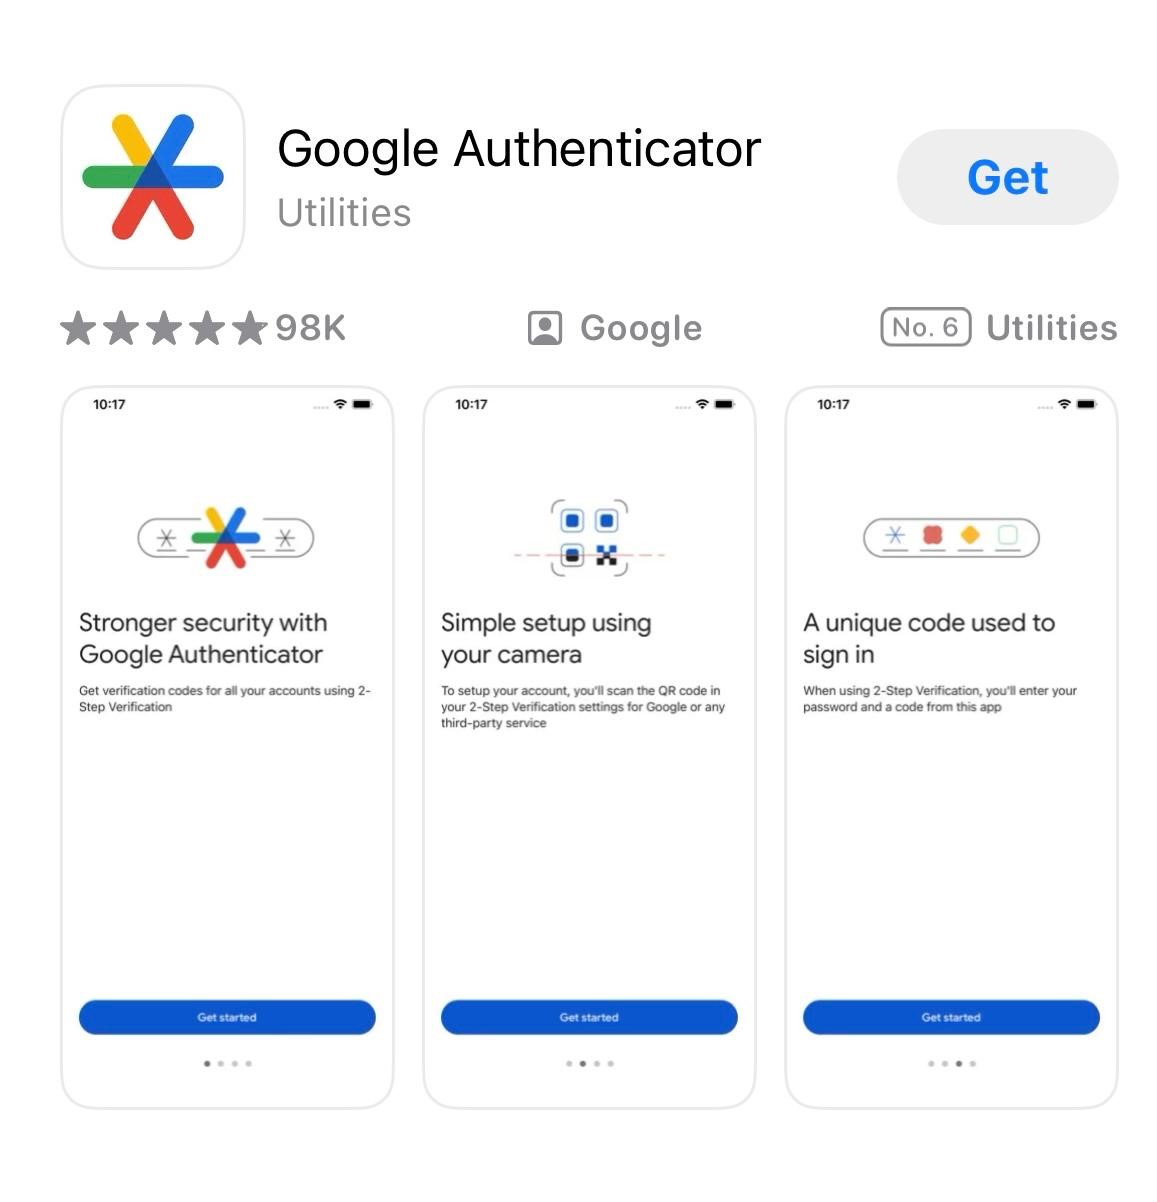
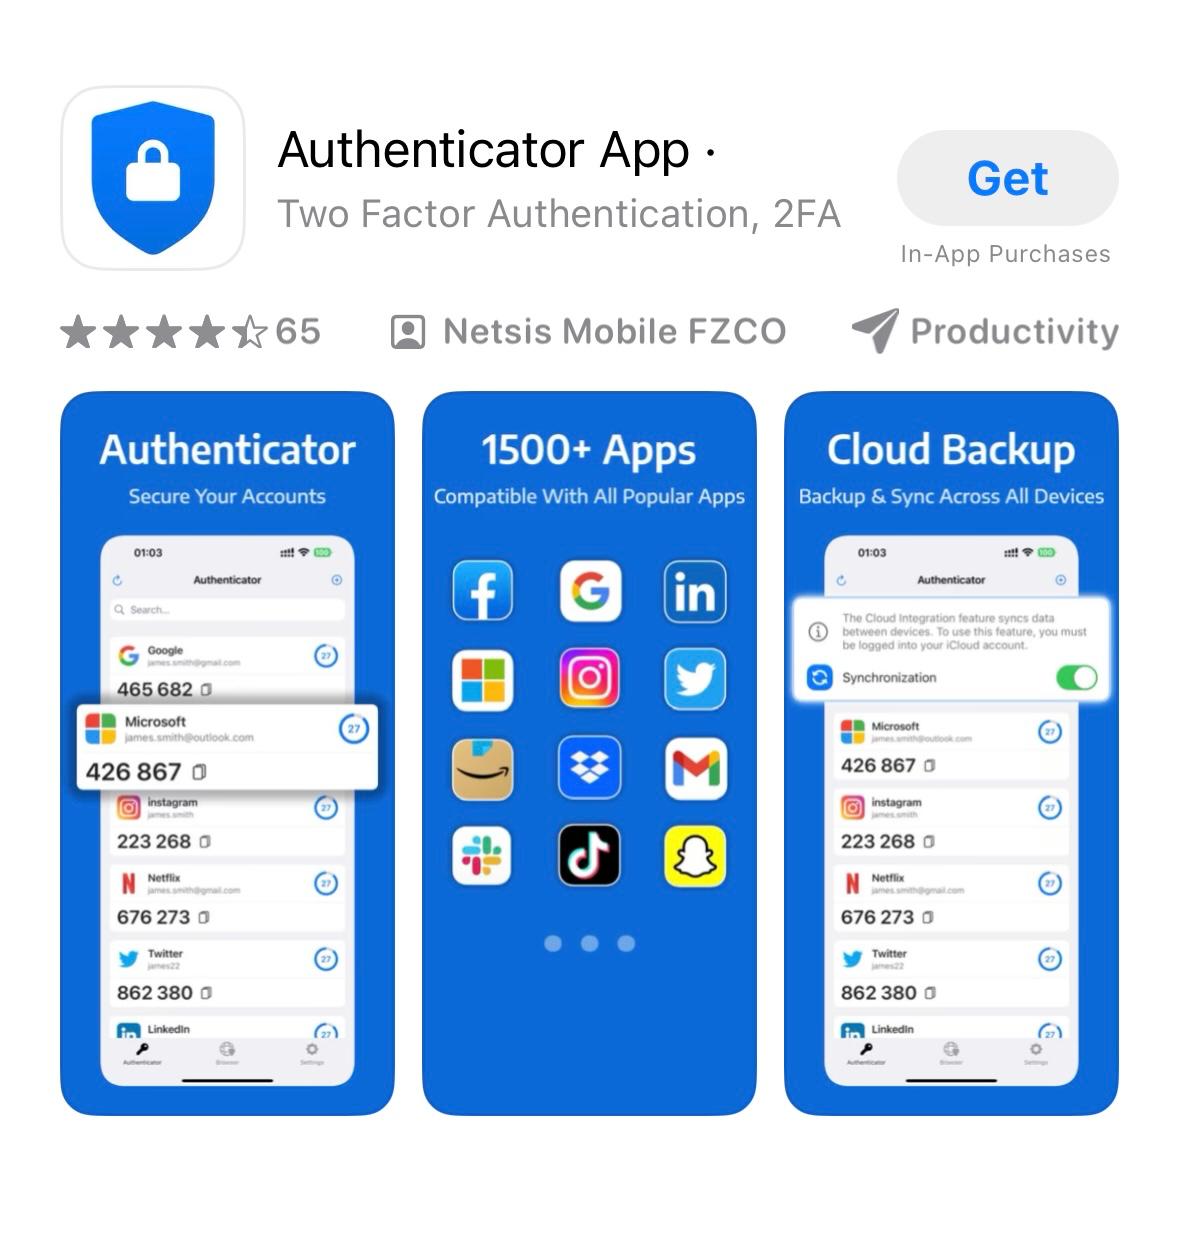
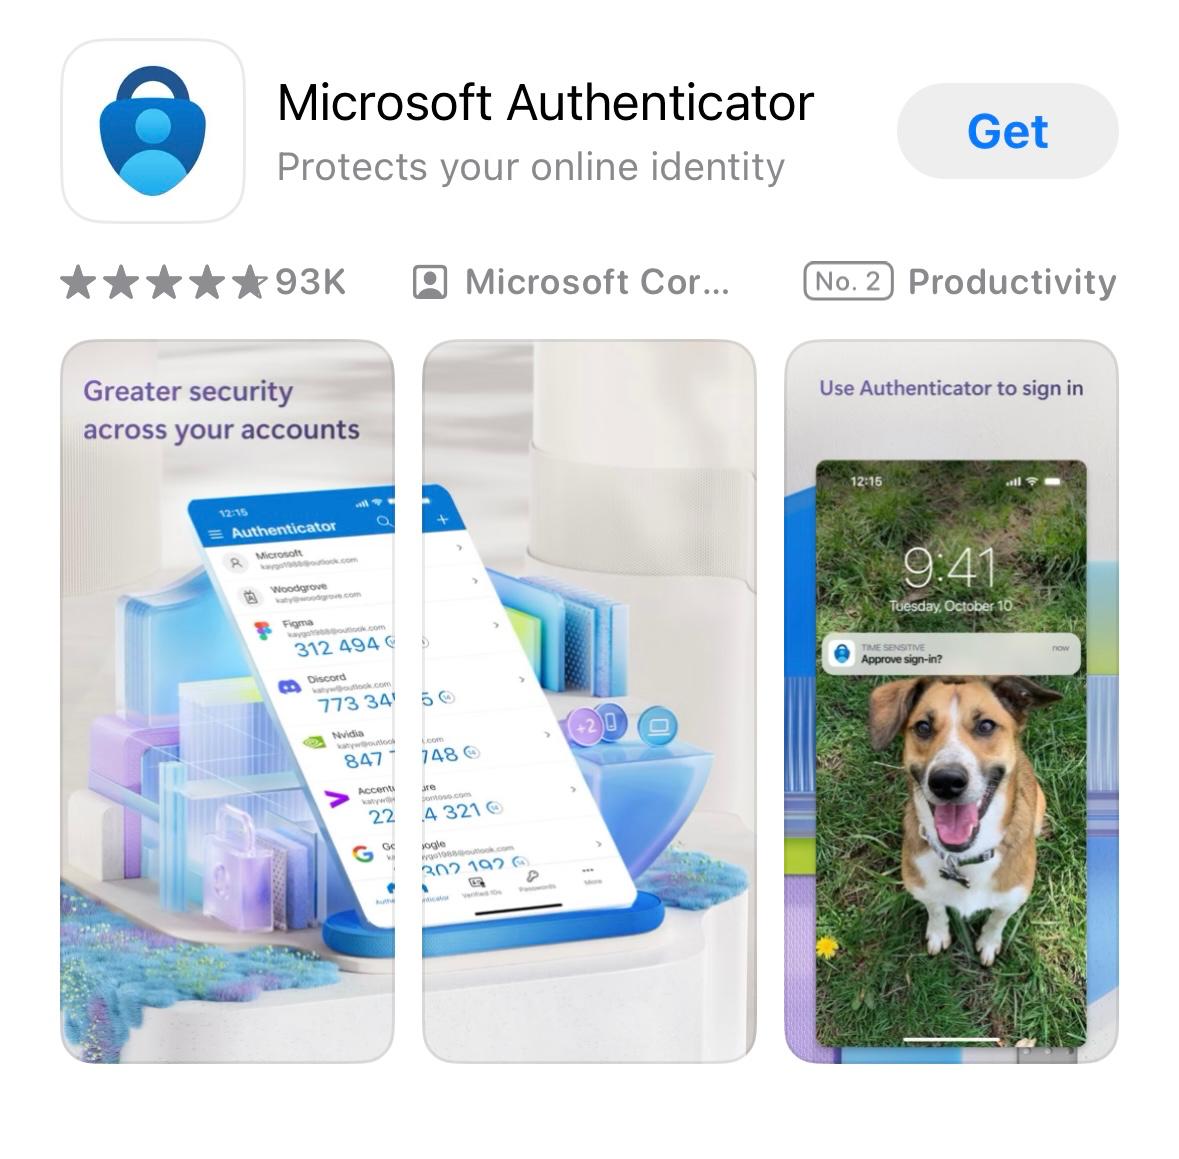
Step 7: Now you have to use your mobile to download the authenticator app, go to Google Play for Android users and App Store for iPhone users and search Microsoft Authenticator app. There are multiple authenticator apps available in the market, you can choose anyone. (Figure 1.7.1 Search Authenticator, 1.7.2 Google Authenticator, 1.7.3 Authenticator App 1.7.4 Microsoft Authenticator)
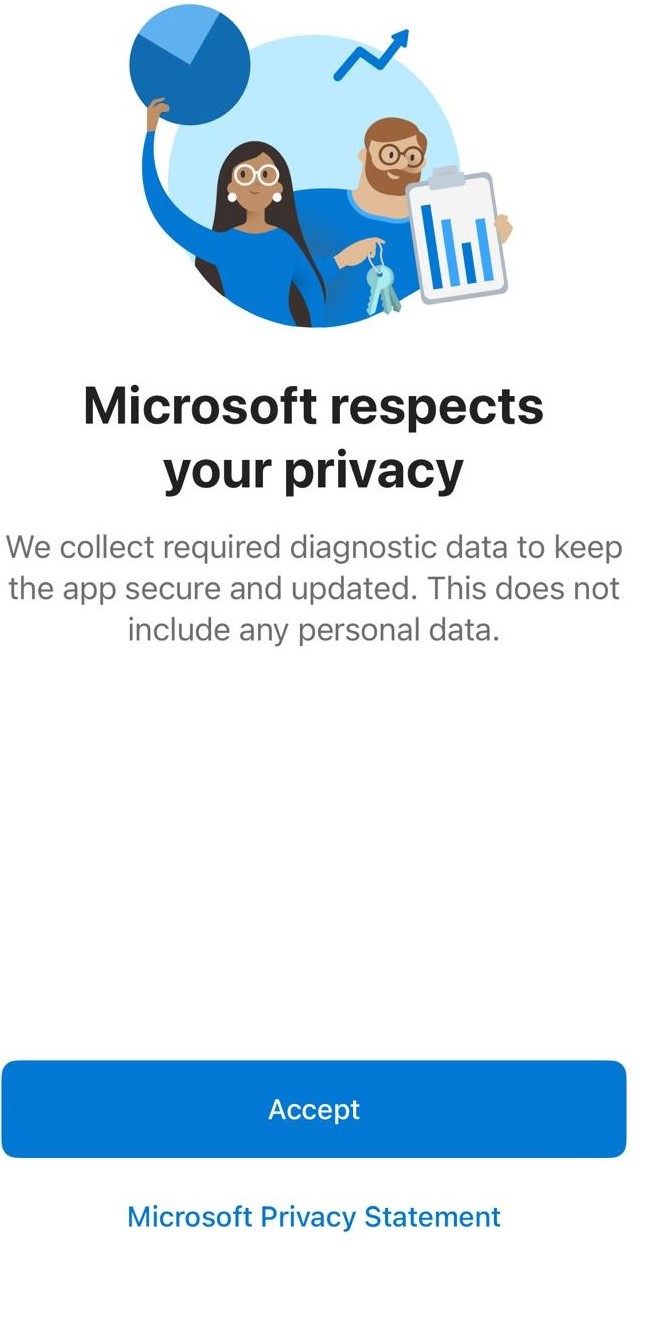
Step 8: When you start downloading the authenticator app, here you will get some privacy policy statements click on the accept button. (Figure 1.8 Privacy policy)
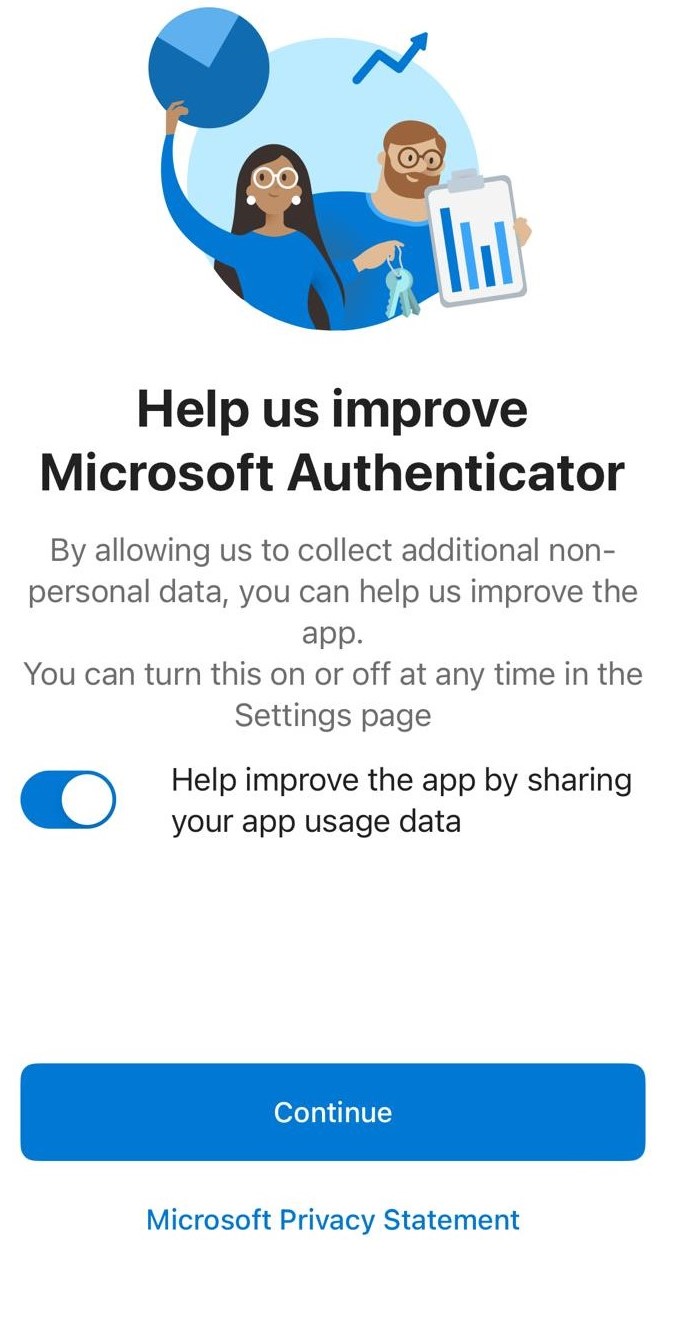
Step 9: Here this app will take permission to access your data, and you can change it later through settings. Click on the Continue button. (Figure 1.9 Personal Data access permission)
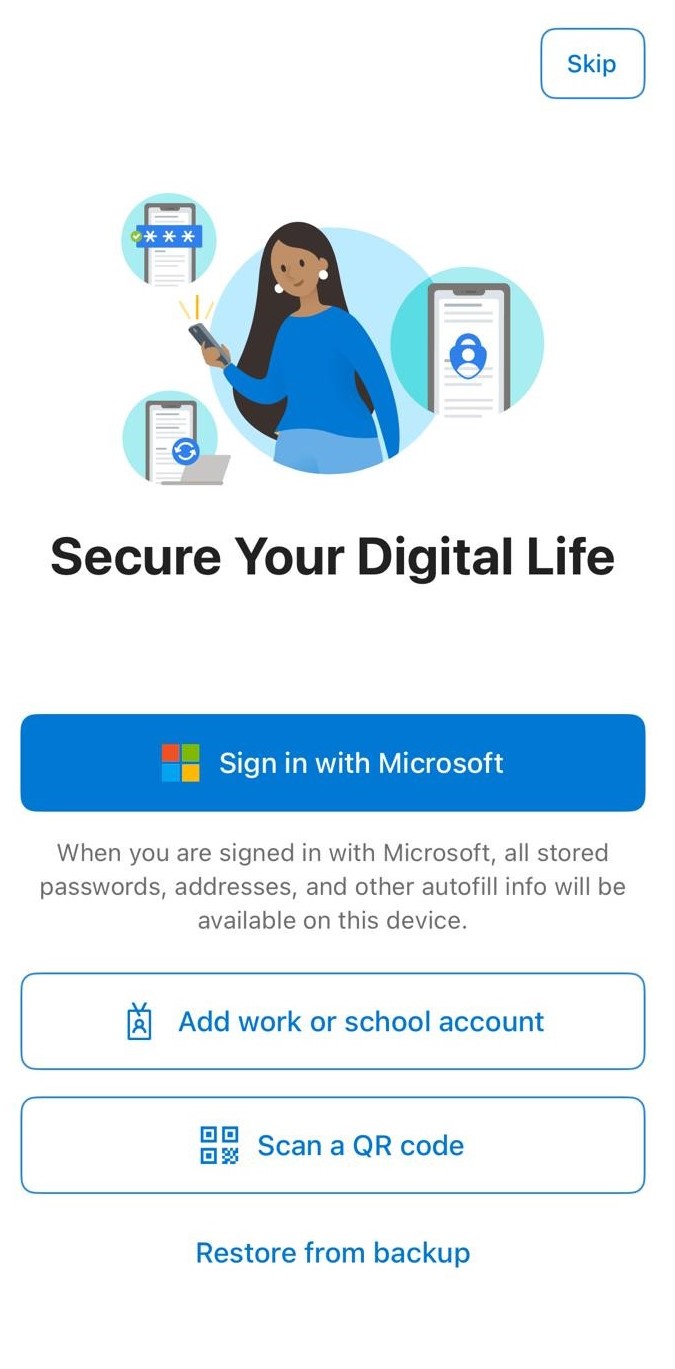
Step 10: On the next page of secure your digital life, here is the last option of scan a QR code. Click on the scan or QR code. (Figure 1.10 Secure your digital life)
Step 11: You will get the scanner to scan the QR code given on the setup device page. Scan the QR code and you will get the MFA code for 30 seconds. (Figure 1.11 Scanner)

Step 12: Fill in the MFA code in the first box which you are getting through the app and wait for 30 minutes then you will get another MFA code, fill in the next box. Click on the Add MFA button. (Figure 1.12 Set up device page)
Step 13: When you click on the Add MFA button, you will get the message MFA device assigned on top of the screen. (Figure 1.13 MFA Confirmation)

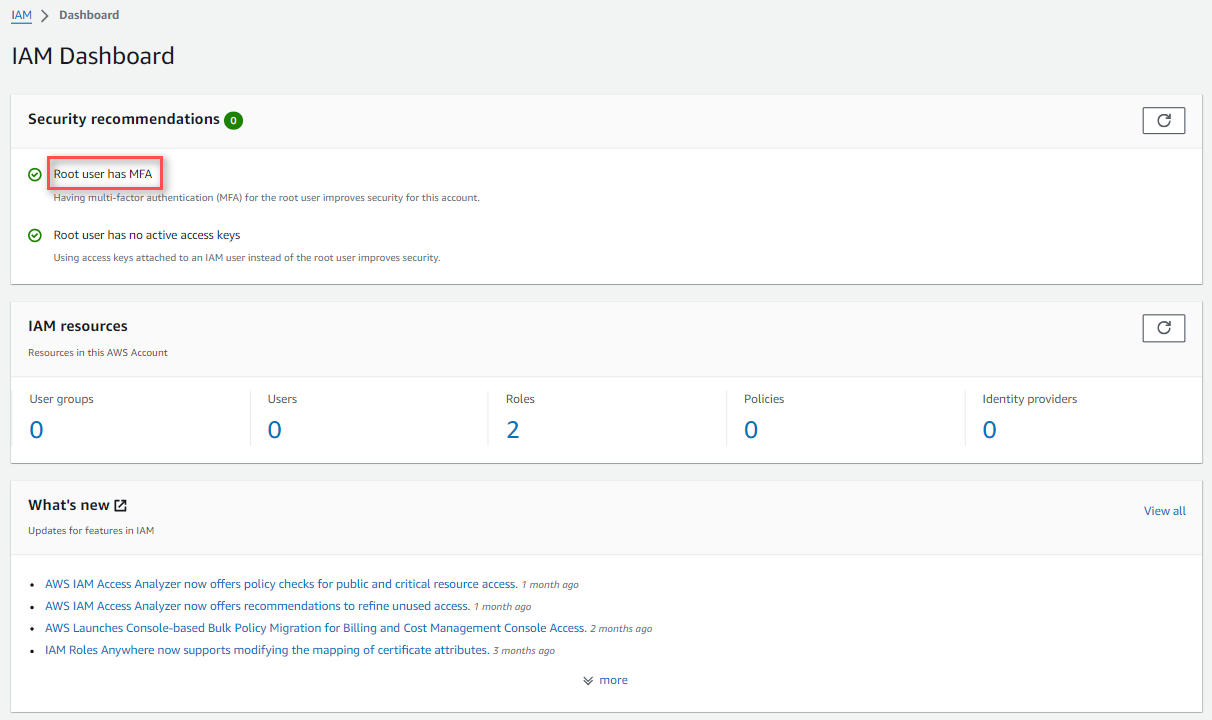
Step 14: Now you can check on the IAM (Identity and Access Management) dashboard, It's mentioned there that the Root user has MFA. (Figure 1.14 IAM Dashboard for confirmation)
Congratulations! You've successfully configured and enabled a virtual MFA device for your AWS root user.
Conclusion
Remember to keep your MFA device secure and make a backup of the QR code or secret key in case you need to replace the device.
As we come to the end of our journey through securing your AWS account, remember this: your AWS account isn’t just a dashboard; it’s your business’s stronghold. Just as you lock your doors at night to protect your home, securing your AWS account is your digital lock against potential threats.
By understanding the importance of strong passwords, Multi-Factor Authentication (MFA), and the layers of security AWS offers, you’ve armed yourself with the knowledge to navigate the digital landscape safely. Each step you take to secure your account brings you closer to a more resilient, confident, and future-ready business.
So, as you manage your data, run applications, and build your digital empire, remember the lessons learned here. It’s not just about locking down access; it’s about creating a digital sanctuary where your ideas, innovations, and aspirations can thrive without fear.
Thank you for joining us on this security journey. May your AWS account remain fortified, your data safeguarded, and your business’s future secure.
Share this post: